Cleaning cat food cans properly ensures safe recycling and reduces odors, bacteria, and pests. This guide walks you through easy, eco-friendly steps to clean, sanitize, and repurpose cans at home.
Key Takeaways
- Always rinse cans immediately after use: This prevents food residue from hardening and reduces odor buildup.
- Use hot water and dish soap for effective cleaning: Hot water helps dissolve grease and protein-based residues common in cat food.
- Sanitize with vinegar or baking soda for deeper cleaning: These natural cleaners kill bacteria and remove stubborn smells.
- Remove labels and adhesives completely: Clean, label-free cans are more likely to be accepted by recycling centers.
- Flatten cans safely before recycling: This saves space and makes handling easier for recycling facilities.
- Reuse cleaned cans for storage or DIY projects: Turn them into pencil holders, seed starters, or pet toy containers.
- Wear gloves and work in a ventilated area: Protect your hands and lungs from bacteria and strong cleaning fumes.
How to Clean Cat Food Cans: A Complete Step-by-Step Guide
If you’re a cat parent, you probably go through quite a few cat food cans each week. Whether you feed your feline friend wet food daily or as an occasional treat, those little metal cans can pile up fast. But instead of tossing them in the trash, cleaning and recycling them is a smart, eco-friendly choice. Not only does it reduce waste, but it also helps conserve resources and supports sustainable living.
In this guide, you’ll learn exactly how to clean cat food cans the right way—whether you plan to recycle them, reuse them at home, or donate them for craft projects. We’ll cover everything from immediate rinsing to deep sanitizing, label removal, and safe handling. By the end, you’ll have a simple, repeatable process that keeps your kitchen clean, your recycling bin organized, and your conscience clear.
Let’s dive in!
Why Cleaning Cat Food Cans Matters

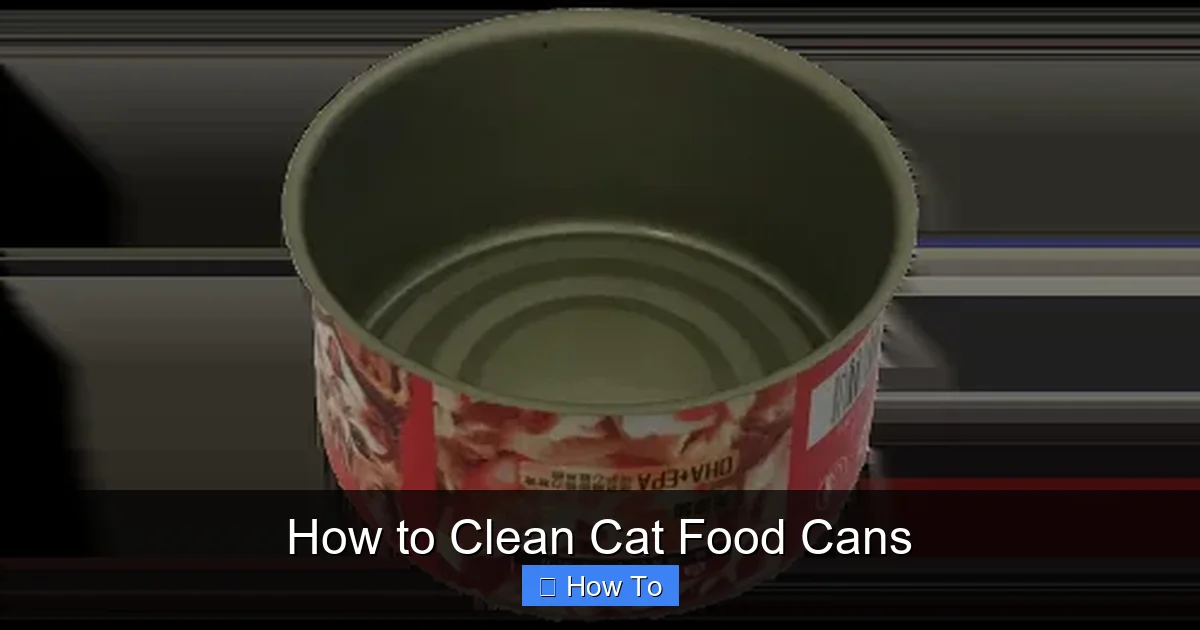
Visual guide about How to Clean Cat Food Cans
Image source: ueeshop.ly200-cdn.com
Before we get into the how-to, let’s talk about why this matters. You might think, “It’s just a can—why bother cleaning it?” But here’s the truth: uncleaned food cans can cause real problems.
First, leftover food attracts pests like ants, flies, and even rodents. Even a tiny bit of tuna or chicken residue can become a dinner invitation for unwanted guests. Second, bacteria thrive in moist, protein-rich environments. Over time, that can lead to unpleasant odors and potential health risks, especially if you’re storing the cans before recycling.
Third, most recycling centers require cans to be rinsed. Contaminated recyclables often get rejected and end up in landfills anyway. In fact, according to the EPA, food residue is one of the top reasons recyclables are contaminated. By cleaning your cat food cans, you’re not just doing your part—you’re ensuring your effort actually counts.
Finally, cleaning cans opens the door to creative reuse. A clean, dry cat food can makes a perfect container for nails, buttons, or even homemade cat toys. So whether you’re recycling or repurposing, cleaning is the essential first step.
What You’ll Need
Before you start, gather these supplies. Most are probably already in your kitchen:
- Hot water
- Dish soap (preferably eco-friendly)
- Sponge or scrub brush
- Rubber gloves (optional but recommended)
- White vinegar or baking soda (for deep cleaning)
- Paper towels or a clean cloth
- Label remover (like Goo Gone) or rubbing alcohol
- Can opener (if the can wasn’t opened with a pull-tab)
- Tongs or a magnet (for handling sharp edges)
Having everything ready makes the process faster and safer. Now, let’s get cleaning!
Step 1: Rinse Immediately After Use
The golden rule of cleaning cat food cans? Rinse them right away. The sooner you do it, the easier it is. Dried-on food is much harder to remove and can lead to stubborn stains and smells.
How to Rinse Quickly
As soon as your cat finishes eating, grab the can and head to the sink. Pour out any leftover food into the trash or compost (if safe for your system). Then, rinse the can under hot running water. Use your fingers or a sponge to swish the water around, making sure to reach the corners and the rim.
Hot water is key here—it helps dissolve grease and break down proteins. Cold water just won’t cut it. If you have multiple cans, rinse them all at once to save time.
Pro Tip: Use a Magnet to Handle Cans
If the can is still warm from the food or you’re worried about sharp edges, use a magnet on a string or a pair of tongs to hold it. This keeps your fingers safe and makes rinsing easier.
What If You Forgot to Rinse?
Don’t panic! Even if the can has been sitting for a day or two, you can still clean it. Just soak it in hot, soapy water for 10–15 minutes before scrubbing. The soak will loosen dried food and make the next steps much easier.
Step 2: Wash with Soap and Hot Water
Once the can is rinsed, it’s time for a proper wash. This step removes any remaining grease, oils, and bacteria.
Fill a Sink or Basin
Fill your sink or a large basin with hot water and add a few drops of dish soap. Swirl it around to create suds. If you’re cleaning several cans, this method is much more efficient than washing one at a time.
Scrub Thoroughly
Submerge the can and use a sponge or scrub brush to clean the inside and outside. Pay special attention to the rim and the bottom—these areas often trap food particles. For narrow cans, a bottle brush or an old toothbrush works great.
Rinse Again
After scrubbing, rinse the can under clean, hot water to remove all soap residue. Soap left behind can affect recycling and may leave a taste if you plan to reuse the can.
Safety Note: Watch for Sharp Edges
Metal cans can have sharp edges, especially if they were opened with a manual can opener. Always handle them carefully. If you’re worried, wear gloves or use tongs. You can also file down rough edges with sandpaper if you plan to reuse the can.
Step 3: Sanitize for Extra Cleanliness
Even after washing, bacteria and odors can linger. Sanitizing ensures your cans are truly clean—especially important if you’re reusing them or have a sensitive nose.
Option 1: Vinegar Soak
White vinegar is a natural disinfectant and deodorizer. Fill the can with equal parts white vinegar and water. Let it sit for 10–15 minutes. Then, scrub again and rinse thoroughly. The vinegar smell will disappear once the can dries.
Option 2: Baking Soda Paste
For stubborn odors or stains, make a paste with baking soda and a little water. Apply it to the inside of the can, let it sit for 5–10 minutes, then scrub and rinse. Baking soda is gentle but effective at breaking down organic residues.
Option 3: Boiling Water (For Reuse Only)
If you’re planning to reuse the can for food or drink storage, boil it in water for 5 minutes. This kills bacteria and sterilizes the surface. Let it cool completely before handling.
Why Sanitize?
Sanitizing isn’t always necessary for recycling, but it’s a great habit. It gives you peace of mind and ensures your cans are truly clean—especially if you have multiple pets or a busy household.
Step 4: Remove Labels and Adhesives
Most recycling centers require labels to be removed. Paper labels and sticky glue can contaminate the recycling stream, so taking them off is a crucial step.
Peel Off What You Can
Start by peeling off as much of the label as possible. Some come off easily; others may tear. That’s okay—just get the big pieces.
Soak in Warm, Soapy Water
Fill a bowl with warm, soapy water and submerge the can for 10–20 minutes. This softens the adhesive and makes the label easier to remove. After soaking, use a sponge or your fingernail to scrape off the rest.
Use a Label Remover or Rubbing Alcohol
For stubborn glue, apply a small amount of label remover (like Goo Gone) or rubbing alcohol to a cloth. Rub the sticky area until it’s gone. Be sure to rinse the can thoroughly afterward to remove any chemical residue.
Alternative: Freezer Method
If you’re dealing with a particularly sticky label, try the freezer trick. Place the can in the freezer for 1–2 hours. The cold makes the glue brittle, so it peels off more easily.
Pro Tip: Save Time with a Label-Scraping Tool
Keep a dedicated tool—like a plastic scraper or an old credit card—for removing labels. It’s faster than using your fingers and reduces the risk of cuts.
Step 5: Dry Completely
Moisture is the enemy of cleanliness. A damp can can develop mold or rust, especially if stored for a while.
Air Dry Upside Down
Place the cleaned can upside down on a drying rack or clean towel. This allows water to drain out and air to circulate inside. Avoid stacking cans while they’re wet—this traps moisture.
Speed Up Drying with a Towel
If you’re in a hurry, use a clean, dry cloth or paper towel to wipe the inside and outside. Make sure there’s no water left in the corners.
Check for Hidden Moisture
Give the can a gentle shake. If you hear water sloshing, it’s not dry yet. Let it sit a bit longer or wipe it again.
Why Drying Matters
Even a small amount of moisture can lead to rust, especially if the can is stored in a humid area. Rust not only ruins the can but can also contaminate other recyclables.
Step 6: Flatten for Recycling (Optional)
Many people flatten their cans to save space in the recycling bin. But should you?
Check Local Recycling Rules
Some recycling centers prefer flattened cans because they take up less space. Others ask you to leave them whole so they can be properly sorted by machines. Check your local guidelines before flattening.
How to Flatten Safely
If your center allows it, use a can crusher or step on the can with your foot (wear shoes!). Always make sure the can is completely clean and dry first. Sharp edges can still be dangerous, so handle with care.
Alternative: Nest Cans Together
If you don’t have a crusher, you can nest smaller cans inside larger ones. This saves space without flattening and keeps edges intact.
Pro Tip: Store in a Dedicated Bin
Keep a small bin or bag under your sink for cleaned cans. This keeps them organized and prevents clutter. Label it “Clean Cat Food Cans” so everyone in the household knows what to do.
Creative Ways to Reuse Cleaned Cat Food Cans
Why stop at recycling? Cleaned cat food cans are surprisingly versatile. Here are some fun and practical ways to give them a second life:
Storage Containers
Use them to store small items like nails, screws, buttons, or craft supplies. The metal is durable and the size is perfect for drawers or toolboxes.
Seed Starters
Poke a few drainage holes in the bottom and fill with potting soil. Perfect for starting herbs or small plants indoors. Just remember to label them!
DIY Cat Toys
Turn the can into a treat-dispensing toy. Drill small holes in the side, fill with kibble, and let your cat roll it around to get the food out. Always sand the edges smooth to avoid injury.
Pencil or Pen Holders
Decorate the outside with paint, stickers, or washi tape and use it on your desk. It’s a great way to add a personal touch to your workspace.
Emergency Candles
Fill the can with wax and a wick for a simple candle. Never leave it unattended, and use only in safe, fire-resistant areas.
Compost Additives (Use Caution)
Some gardeners use small metal cans to collect compost scraps before transferring them to an outdoor bin. Just make sure the can is cleaned well to avoid odors.
Art Projects
Kids love using cans for crafts—painting, gluing, or turning them into robots or cars. Just supervise to avoid cuts.
Troubleshooting Common Issues
Even with the best intentions, things don’t always go smoothly. Here’s how to handle common problems:
Problem: Stubborn Food Residue
If food won’t come off, soak the can in hot, soapy water for 30 minutes. Add a tablespoon of baking soda to the water for extra cleaning power.
Problem: Lingering Odors
Try a vinegar soak or sprinkle baking soda inside, let it sit overnight, then rinse. You can also place a piece of activated charcoal inside for 24 hours to absorb smells.
Problem: Rust Spots
Small rust spots can be scrubbed off with steel wool and vinegar. If the rust is extensive, it’s safer to recycle the can rather than reuse it.
Problem: Labels Won’t Come Off
Use a hairdryer to heat the label, which softens the glue. Then peel or scrape it off. Rubbing alcohol or olive oil can also help dissolve adhesive.
Problem: Sharp Edges
File down rough spots with fine-grit sandpaper. You can also use a metal file or a rotary tool if you have one. Always wear gloves.
Safety Tips to Keep in Mind
Cleaning cans is generally safe, but a few precautions go a long way:
- Wear gloves: Protect your hands from bacteria, sharp edges, and cleaning chemicals.
- Work in a well-ventilated area: Especially if using vinegar or commercial cleaners.
- Keep cans away from children and pets: Until they’re fully cleaned and dried.
- Don’t use damaged cans for food storage: Dents or rust can compromise safety.
- Wash your hands after handling: Even if you wore gloves, it’s a good habit.
Conclusion
Cleaning cat food cans might seem like a small task, but it makes a big difference. By following these steps, you’re not only keeping your home cleaner and safer—you’re also contributing to a healthier planet. Whether you recycle, reuse, or repurpose, every cleaned can is a step toward sustainability.
Remember: rinse immediately, wash thoroughly, sanitize if needed, remove labels, dry completely, and handle with care. With a little effort, you can turn something as simple as a cat food can into a valuable resource.
So next time you open a can of tuna-flavored delight for your furry friend, don’t just toss the container. Take a few extra minutes to clean it. Your cat, your kitchen, and the Earth will thank you.